Monday, October 10, 2011

Energy Efficiency

 Perhaps you're one of the lucky ones living in a new home or at least a well crafted home.  I am not that lucky.  My house is so drafty all year long.  See the big gap at the top of my front door? 

When it rains, we feel it.  When the wind blows, we feel it.  When the snow flies, it flies through the cracks in the doors.  It is not uncommon for frost to collect at the bottom of my door in the winter. 

 Ideally, I should replace the door, replace the windows, and do a bunch of other things to improve the quality of the house but that is just not feasible right now.  So, the next best thing is to take some steps to at least save the energy I can from escaping and the elements coming in. 

The first thing I did was add weather stripping to the front door.  Nothing could be easier and takes no time at all.  There are plenty of weatherstripping kits to choose from.  I chose a thicker size because it's a sizeable gap. 


Just follow the manufacture instructions which usually involves some easy trimming with scissors.


Clean the door frame with alcohol wipes to ensure a good, tight fit with the adhesive and the wood frame.


Simply apply the adhesive strip.  Voila!  Easy.  Sometimes just stopping the draft makes a huge difference. 

All this week, I will posting more tips on improving the energy efficiency of your homes, easy DIY that make a big difference. 

Thursday, October 6, 2011

Interior Designer vs. Interior Decorator

The two terms designer and decorator seem to be used interchangeably but there are some significant differences between an interior designer and an interior decorator. 

An interior decorator is someone with a knack for accessorizing, combining colors and patterns and has a keen sense of style.  They generally do not have education in the interior design field though they may have taken a class or two.  I have met some decorators who excel at making spaces look great!  Decorators have a place in the market that's for sure. 

In my comings and goings over the years, I run into a lot of people who say, "Can you help me figure out my living room?  I have no clue what I'm doing."  When I meet with them to see the mess I assume they've created because they talked themselves into a ditch about their talents, I find that most people really do know what they're doing.  With a little tweak here and there, it looks great.  Don't second guess yourself when it comes to decorating your home.  There's a decorator in all of us...tap into that.

An interior designer is someone who may or may not have a knack for accessorizing, combining colors and patterns but do typically have a sharp eye for detail and style.  Most importantly, a designer has education; typically 4 years worth and more.  They can have a general, broad education or specialize in a certain field of work just like a doctor.  There are kitchen designers,  health care designers, office systems designers and the list goes on. 

A designer's education is very much like an Architects in fact, a designer can do everything an architect can do with the exception of calculating loads; snow loads, shear walls, the technical stuff.  A designer learns all the principles of good design, space planning, fire codes, building codes and codes for the disabled.  We learn it all and the time spent in school is far more difficult and intense than one may think. 

I am a designer specializing in space planning.  Sometimes, using an interior designer to design your home and office makes more sense than going straight to the architect.  Architects can be pricey.  If your budget is tight, you can often get the space planning and other drawings done by a designer then just pay the architect for the technicalities and it will save you a ton of money in the end.  A designer will work with contractors and other subs to see the construction of your home through. 

So, as your need for design help increases, keep in mind the subtle differences and get the most out of your money!

Wednesday, October 5, 2011

Wreath wrap up

Hopefully, you enjoyed the tutorials this past week.  Sometimes, the smallest things make the biggest difference in the design and look of your home.  None of the wreaths had a lot of cost involved but offered great returns in the style department. 

Through this interior design blog, you will come to learn some great tips for home repair, do it yourself design and articles to help you create a space that is relaxing, inviting and inspiring. 

This winner of their choice of wreath is Tanya C. 

I am looking forward to the growth of this blog and my new company, Inside Story.  Hope you stick around and learn some new things.

Monday, October 3, 2011

Burlap Wreath

Here is the final wreath in my Fall wreath series.  Burlap is a hot trend these days in the world of interior accents.  Again, this wreath is easy and inexpensive.

Supplies needed:
     12" Wreath form
     Burlap strips- One 10"wide by 92" long
                           One 8" wide by 92" long  (You can use two pieces 46" long if you don't have enough length in your yardage)
     Muslin strip- 3" by 80 inches.  Again, you can use smaller lengths and just glue them together
     Chiffon scraps for small flowers
     Hot glue gun and glue sticks
     Needle
     Heavy Thread
     Small brads or beads

First start by wrapping your wreath form in the muslin strip.  You can substitute muslin for linen or burlap.  Secure the ends with hot glue.


Press your burlap strips in half lengthwise then begin stitching a running stitch in preparation for gathering.


Gather up the burlap on both strips.  Adjust the gathers along the wreath before securing with glue


Glue the widest strip down on the wreath first. 


Add the last strip on top of the first, gluing carefully.


Take your linen strip and sketch out a flower design.  I chose a 5 petal flower.  Fold up the fabric and cut out the shape all at once. 


Stack the petals in groupings of three and use a small dot of hot glue to tack the layers.  Add a small brad or bead to the center.


Glue the flowers in place on your wreath.  You can use more or less depending on your taste.


Here is the final wreath.  It is not only cute but sophisticated.  I love the combination of the heavily textured burlap and lightness of the chiffon


So, now that you have learned three new wreath techniques, I hope you are able to create some of your own. 

If you want to be entered in the drawing to win one of these wreaths, leave me a comment on one or all of the wreath tutorial posts and tell me which one you like the most. 

For a second entry, go to my Inside Story Interiors Facebook page and 'Like' it, or you can link this post on your own blog if you don't have Facebook.  Come back here and tell me that you linked this post or 'liked' my Facebook page.
Make sure to check back here on Wednesday to see who the lucky winner is and make sure you contact me with your address info so I can get the wreath to you!!  Good luck!

Friday, September 30, 2011

Twiggy Wreath

This is part two of my wreath tutorials.  This is by far my favorite wreath!!  When I set out to make this wreath, I didn't have a clear image in my mind of how it would look in the end.  I knew the elements I wanted it to have and once I started collecting the material, it just sort of evolved in my mind.  The best thing about this wreath is that it cost me virtually nothing to make.  I had everything I needed on hand or out in nature.  Here is a picture of the finished wreath.


Now, here is what you need to make your own!
Supplies:  branches collected from dead trees
                an old book you can cut up
                bowl of water
                hot glue gun and glue
                twine
                seed beads
                scissors and exacto knife

I headed out to one of our local parks to collect my branches.  I only selected branches that were dead and laying on the ground so no living trees were destroyed in the process. ;-)  I chose branches that had a nice, gentle curve to them. I liked the fact that one branch even had a couple of dead leaves still attached.

Arrange the branches in the manner you would like in the shape you want.  My wreath is in an asymmetrical shape.  I like to try new things and a deviation from the round wreath is a nice change.

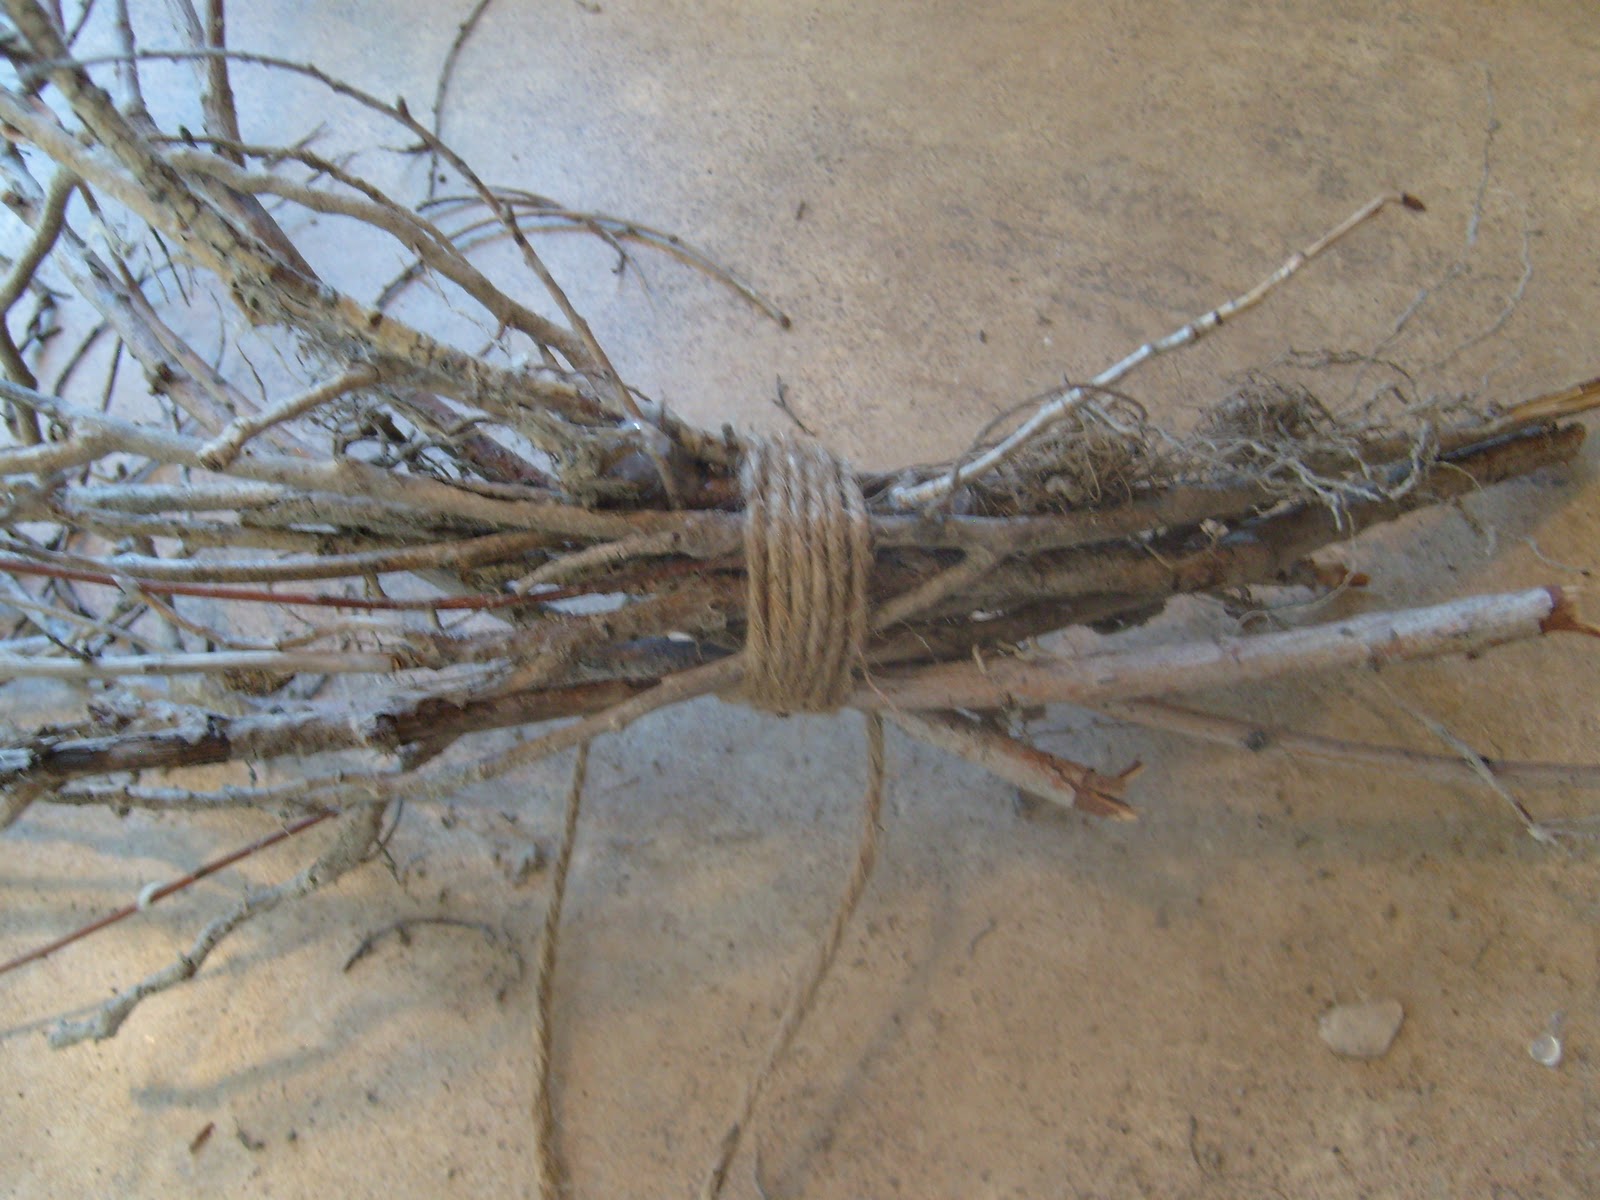
Once you like the way the bundle looks, secure the branches with some twine.  You may also need to add some hot glue it the twine is not enough.


 Next, take your old book and remove several of the pages either with an exacto knife or by tearing.  Be careful if you choose the exacto knife method so you don't get cut.


Cut several random shapes that only need to resemble a circle.  The less perfect the better.  I cut 4 different sizes so I had a nice variety to choose from.  The number will depend on how many flowers you want to make.  I would cut out at least 12 of each shape and size.  Since they don't have to match, you can cut several out at once by stacking the paper. 


Next, soak the cut flowers in a bowl of water just for a few seconds until they feel less stiff.  My paper was old and thicker with a lot of binders in it so I soaked it for about 15 seconds. If your paper is thin, you may only need to get it wet for a second or two.


When taking out the flower, crumple it up to gently squeeze the excess water out.


Un-crumple them but don't flatten them and leave them out to dry.  This gives them some nice, aged dimension.


Place a dot of hot glue in the center of a large petal then layer with a smaller petal, another dot of glue then another small petal.


The glue is hot so I use the end of a pencil to press the centers together


Add another drop of glue to the center of the top petal and drop in some seed beads.


Arrange the flowers on the wreath.  Clusters of odd numbers work the best. Use hot glue to secure the flowers to the twigs.  If you want, you can trail some flowers down the extra twine, if not, just trim the ends of the twine


So, what do you think?  I love this wreath.  Unfortunately, the pictures don't do the beauty of these flowers justice. 

You have to try this! 


Wednesday, September 28, 2011

Fall Wreaths

Fall is well underway, the leaves are turning and will soon be falling.  It's been a great Indian Summer and what better way to celebrate the last few warm days before the snow than sprucing up your front door with a new wreath.  Over the next few days, I will be posting three very simple, very beautiful and very inexpensive wreaths that you can make yourself.  At the end of the wreath series, I will be holding a giveaway so that you can win one of the wreaths!

Today's wreath is a ribbon wreath!  Let's get started. 

Supplies:   A selection of gros grain or satin ribbon.  About 25-28 yards worth
                A wreath form
                Scissors
                Hot glue gun with glue, duct tape

For my wreath form, I used pipe insulation.  I got this long piece from Ace Hardware for 3.99.  It's about 2" in diameter and cuts easily with scissors.  It was long enough for me to make two wreaths.


If you are making your own form you will need to cut a length so that it will make a 12" diameter form.  Duct tape the ends together.  I like this material because it is lightweight as opposed to your typical straw wreath form which you can use but it's way more expensive.


Wrap the wreath in one of your ribbons.  This just helps to hide the ugly color of the form.  Hot glue the ends down so it doesn't unravel on you.


I chose several colors for my wreath.  A striped, chocolate brown, red and gold.  I used a 1 3/4" width satin ribbon.  Cut the ribbon into 17" strips then begin tying onto the wreath.  It's that simple!  Just tie a knot and don't worry about how neat the knot looks.  Messy works too which makes this a great craft, especially for beginners.


Continue tying all the ribbon strips on, making sure to push each knot close to the one before.


Here is the final wreath!  At first, it didn't look like much but once I hung it on my door, it really looked nice.  It's a great change from the usual floral wreath and much easier to construct.  Depending on the ribbon you use, you may need to stop the ends from fraying with a little fray check, clear nail polish or you can singe the edges with a candle flame but be very careful not to burn yourself or catch the ribbon on fire.  It's quick and easy but can be dangerous so burn at your own risk!

Check back on Friday when I will have another wreath to show you.  It is actually my favorite design and I can't wait for you to see it.  When I am done with my spotlight on wreaths, I will be giving one of these wreaths away.  Tell all your friends, link up my blog on facebook, twitter or your own blog then watch for more instructions on how you can win.  It's really easy!  See ya Friday!

Tuesday, September 27, 2011

Tricky...but not really

If you are interested in Interior Design and the decoration of your home, then odds are you love beautiful things and can appreciate all sorts of art forms from cutesy crafts to exquisite art pieces.  Maybe you're like me and follow the trendiest crafting blogs. 

I follow 5 or 6 blogs and there is something I have noticed the crafting world doing.  These die hard crafters scour magazines for things they love then spend a little time figuring out how they can achieve the same look only on the cheap.  Some of them are pretty successful!  Anthropologie and Pottery Barn seem to have the most appeal for knock offs. 

You can easily apply the same concepts as you consider the decor of your home.  You don't have to spend a small fortune to create a pleasing and relaxing space.  As we talk further about decorating on a dime, I will show you some things that are easy to do and create a unique and inspiring look from headboards to desk tops and art for the walls.  This is where your idea file we talked about earlier comes into play.  Look at those files again...are there things you can knock off yourself, make for less...I bet there is, think about it.

I have been busy creating Fall wreaths!  I will be doing tutorials for three awesome wreaths you can do on the cheap.  There will also be a contest so you won't want to miss out!  Tell all your friends then join me here on Wednesday for the first wreath tutorial!